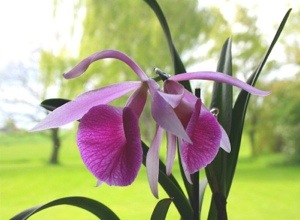
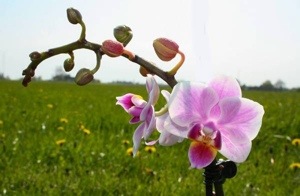
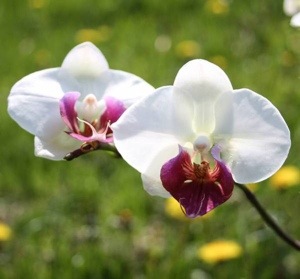
Phalaenopsis is probably the most well known orchid in the world, although there aren’t all that many people that know its name – it’s well known mainly due to the fact that it’s the orchid that’s commonly seen in supermarkets, big box stores, and similar places.
My very first orchid was a Phal, Well, “is”, as she’s still alive and well today. And although I have many other orchids now, the Phal is one of my favorites, mainly because it’s so easy to care for. Also, it comes in many, many different varieties, so no matter how your taste in orchids is, you’ll probably be able to find a Phal that suits you. And even if you haven’t had any orchids before and you have no idea how to care for them, you’ll probably still have quite a hard time, killing the Phal, especially if you follow these guidelines:
LIGHT: Phals like light, like any other plant. But do make sure it doesn’t get direct sunlight, or at least as little direct sun as possible – otherwise, its leaves might get “sunburned” (meaning they’ll develop dark yellow or brown patches), so make sure the light is filtered somehow. Placing them in an east- or west-facing window means that it only gets direct sunlight by the weaker morning or evening sun, which is sufficient.
HUMIDITY: Phals don’t require extra measures taken in regards to humidity. Natural humidity levels are just fine.
TEMPERATURES: Phals are pretty mellow when it comes to temperature. They seem to like the same temperatures we do, so regular room temperature (20 to 25°C / 68 to 77°F) is just fine, but it’s pretty hardy when it comes to cooler or warmer temperatures – but make sure it doesn’t get too hot or too cold anyway.
WATER: The main cause of death for orchids is overwatering – not under, but over. Like a lot of orchids, Phals like their potting media to dry out completely in between waterings. Stick your finger into the media or use a stake – if it’s still moist, don’t water. If you’re not sure, hold the water for a day or two until you’re sure the media is dry. As for what water to use, tap water is usually just fine, but if your water is softened, you might want to consider using rainwater. Make sure the leaves don’t get wet – if they do, wipe the water off with a paper towel, as the water might lead to rot.
FERTILIZER / FEEDING: Use a fertilizer made especially for orchids – these fertilizers are normally NPK fertilizers (containing Natrium, Phosphorous, and Potassium, as well as micro- and macro-nutrients, essential for orchids). Fertilizers with urea should be avoided, so read the label. If you don’t fertilize, the Phal will quickly lose its blooms – but once again, don’t overfeed; half the recommended dosage once every month is enough.
POTTING MEDIA & POTS: If you’ve bought your Phal in a supermarket, chances are that it’s been planted in normal houseplant soil – this is bad for the roots as they cannot breathe, so it’s time to repot! Normally, it’s not advisable to repot while the plant is blooming, but if it’s indeed planted in normal soil, I’d do it anyway.
What you need is potting media made especially for orchids. Don’t skimp either, as cheap media might be as bad as the houseplant soil. Use something that consists of mainly bark pieces (there may be coconut husks in there as well, but that’s great too). If you’re new to orchids, I wouldn’t advise using moss or spaghnum, as this retains more moisture than bark pieces, and might lead to overwatering (which leads to rotting of the roots, which then leads to a dead plant). Once you have the media, you make sure the Phal is potted in a transparent plastic pot, which means you can make sure that the roots are healthy – also, make sure there are drainage holes in the pot. You can also use a mesh pot, which allows more airflow to the roots, but I wouldn’t advise using non-transparent pots. Clay is okay too, but you won’t be able to check the roots, so only use clay once you’re sure your watering schedule is working.
REPOTTING: My advice is to repot your Phal every year, when the plant isn’t blooming – the potting media breaks down and that means less airflow to the roots. As it breaks down, it also retains moisture for longer and longer. And once again, if your Phal is planted in regular houseplant soil, I’d repot straight away, even if the plant is blooming. Repotting is pretty easy – just follow these steps:
1) Soak the pot and media in water for about 30 minutes.
2) Moisten the media you’re going to use to repot.
3) Pick a pot, if the old one needs changing. Even if the pot seems to be tight, this is good – if it’s too small to hold the roots at all however, use a larger pots, but still make sure the roots are packed somewhat tightly in it. Even if you can’t fit all the roots into it, just leave some outside the pot or above the media.
4) Gently loosen the plant from the old pot – this should be easier now that the media is wet. If it’s stuck because the roots have grown through the drainage holes, gently loosen the roots.
5) Remove the old potting media and dead roots (live roots are silvery green, bright gray or green – dead roots are usually brown, black and/or hollow). If you can’t get the media out from in between the roots, loosen it with a stake.
6) Put the roots into the pot you want to repot into. Once again, if you can’t fit all of the roots into the pot, it’s all good – roots do fine above ground.
7) Gently put the fresh media around the roots, into the spaces between the roots, and on top of the roots – pat it a bit so the plant is stable and doesn’t wobble (then it can’t settle).
8) Put the plant in a room that keeps a somewhat even temperature, preferably on the cool side. This prevents shock, and will help the plant settle. Don’t water until the media is completely dry. Move it back to its old spot after approximately two weeks.
If this isn’t enough info, feel free to send me a message/ask a question – I’ll be happy to answer. 🙂


